Monday, August 17, 2015

Pants! The New Sewing Project

Yep, you heard me. I'm sewing some pants. It is a self challenge, really, as I have made myself pants many times, with varying degrees of success. Mainly, I make double knit pants with elastic waists for myself. Not terribly fitted, and but sometimes, I've made pants that just didn't turn out right. I would wear them a time or two and the fit wasn't right. Or they felt funny. Or???

I think my skills have improved over the past few years, though, so I psyched myself up to making some fitted, waist-banded, twill pants.  I got this jeans pattern several years ago, and it has been waiting patiently for me to decide that the time has come
with instructions on fitting them
I looked at the pattern, and the instructions. I watched a video class from Craftsy. I made a muslin, and then cut out two pair, one in khaki and one a very nice blue twill. I cut out some pretty pocket lining for the khaki pair, but I haven't cut into the fabric I want to use for the blue ones, so those will have to wait. As many things as I cut out over the summer, I can't believe there is still a pile to be cut.

So, Sunday, I pulled out those pants, and got started.
The pockets went together first.
Then the fly went in. 
The front of my pants!
I'm very happy with the detail sewing that is happening. I followed the suggestion from the video to to the top stitching with a stitch that goes over itself a couple times. While it isn't my first zipper, I think it may be my first fly front. 

Gosh I hope they fit right, because so far they look awesome! 

No, I don't think my head is getting too big. I know I still have the waistband to deal with, and how those never do seem to come out like I think they should. Sigh...


Monday, July 27, 2015

TIE DYE!!! Part 2

Today was the reveal day for the tie dye shirts. Eight of them. And its not like you can pull them out of the bag and hold them up to see, either, because the dye is dripping everywhere and needs to be rinsed out, and then a trip through the washer and drier before they're done.

What I like about tie dye, is that there is no failure. Your item may or may not resemble what you had in mind when you tied it up and squeezed some dye all over it, but it is always an interesting result. The dyes are pretty, so the shirts are too.

We got some interesting and entertaining results. Yes, I took pictures!

swirly!
These are our swirled shirts. The basic idea is to grab a center point on the shirt and turn until the whole thing is coiled up. You can tie or rubber band around it to hold it together, which sometimes works better than other times. The backs of both of these - shown - turned out brighter than the fronts. Not sure why. The purple along the left side of the left shirt has some interesting shapes to it, and I really like how the red and black went together on the shirt on the right.

pleat folds
I folded my shirt vertically, and Carl folded his on a diagonal. I used red and blue, while he used more of a variety. We got more white space on Carl's than expected, but it doesn't mean it isn't a cool looking shirt. I really like the effect of that red strip on the back of my shirt, and I got a surprising effect on the front, as modeled here:

Is that an arm? I don't think this is going to add any support in that area...
Raine did more of a folded technique on her shirts, one on the diagonal, and one vertical and she got some interesting results as well. Not her first time dying, but her first with artistic intent involved. She was about 4 when we tie dyed last time.

Raine's shirts
I did one of those gather up a pointy hunk of fabric and wrap rubber bands around it here and gather up another hunk over there kinds of shirts as well, and got some lovely, colorful results.

rings of color!
I really like the yellow, which I used on the parts of the shirt that weren't tied into hunks, it is bright and happy, and the orange is awesome, too.

Finally, Carl made a black dye on heather grey shirt. He said he put so much dye on it, he was afraid it was going to come out all black. Nope.

Rorschach's test anyone?
Not as much dye as you would think, but, is that a guy in a suit over there on the left side below the seam? I think he's coming in for a hug. Here's a close up of the spot just to the left of the pocket.

Yep, definitely a panda...
You can't plan this stuff people. Even if you don't get what you expect - or maybe even hoped for - it is still visually interesting, and THAT, my friends is success.

Sunday, July 26, 2015

TIE DYE!!! part 1

OK, first thing, let me say this. Tie dye is messy. Not the project that you can work on for a while, then pick up your camera and take a few process shots. You would need a designated photographer, and we didn't have one. So there aren't a lot of pictures in this post. Of course the shirts aren't finished yet, either...

About 8 years or so ago, we had a great time tie dying some shirts. The dye we used was from Dharma traders, and it isn't basic Rit. I think I'm wearing the last shirt from that batch. We wore them out. They got holes faster than they faded. We LOVED those shirts.

When I suggested tie dye to my family this summer, it was a go. Since the plan today was to dye, I started looking for our box of stuff last night. In the craft room. You know, with all the boxes? Yeah. My brother and I both remembered putting them in the cabinets and something about mason jars. Hmmm. There was no jar box in the cabinets, and no tie dye stuff in there in any other kind of box. There were mason jars. Yep, those I found.

So, this morning I started moving boxes and going through stuff. I gave away Raine's old play dough gear and was surprised that three of the tubs had actual, usable play dough in them. I moved this, and pawed through that. Carl came over to help.

Just when we thought we were out of luck, I lifted the lid off one. more. tub. There it was!!! Yay!

Anyone want to tie dye?
We made up the dyes, and tied up our shirts. The instructions we used before said to soak the shirts in a soda ash bath, which will help fix the dye. Then, we took them outside to play with the dyes. MESSY! Each shirt then went in a plastic bag to let the dyes set overnight.

tie dye shirts marinating
Tomorrow they get rinsed until the dye doesn't run, and then washed & dried. I can't wait to see how they come out. It may not turn out the way you thought it would, but the results will be awesome none-the-less!

Loving the colors!

Thursday, June 25, 2015

Bead Weaving

This post has two purposes. One to talk about crafting and the learning process. The other is to show off some of the beadwork I've done this summer.

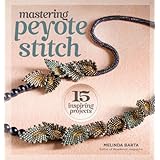
First, we should talk about that learning process. I have been yearning to work with my beads, and I've been wanting to learn how to do peyote stitch. I checked this book out of our local library at the beginning of June:

Product Details

I read a few pages. I mean only a few. I looked through the pictures and the projects were beautiful, but reading? I had to start at the beginning, of course, and practice that. I might be able to go back to that book again sometime in July, for project ideas, and further instructions. In the mean time, I can share some of the advice the author gave, and how well that advice has worked for me so far.

She begins with an explanation of many different types of beads, and advises using beads that are very uniform for peyote stitch projects. I dug through my bead box and tried a couple different possibilities, with  varying success. I should also step back and say I also wanted to use beading wire to do these projects, and that has NOT been successful. I have had to use beading thread because basically, the wire has not been flexible enough. I guess with some very large beads it might work, but nothing that I have done so far.

practice, practice, practice
I tried these beads, and although they aren't as uniform as my next attempt, there was some learning done. One thing was that I just randomly selected the beads, and I think I had some directional issues an other placement problems. For my next project, I decided to alternate rows of color so that I could more easily get used to threading through the correct bead.
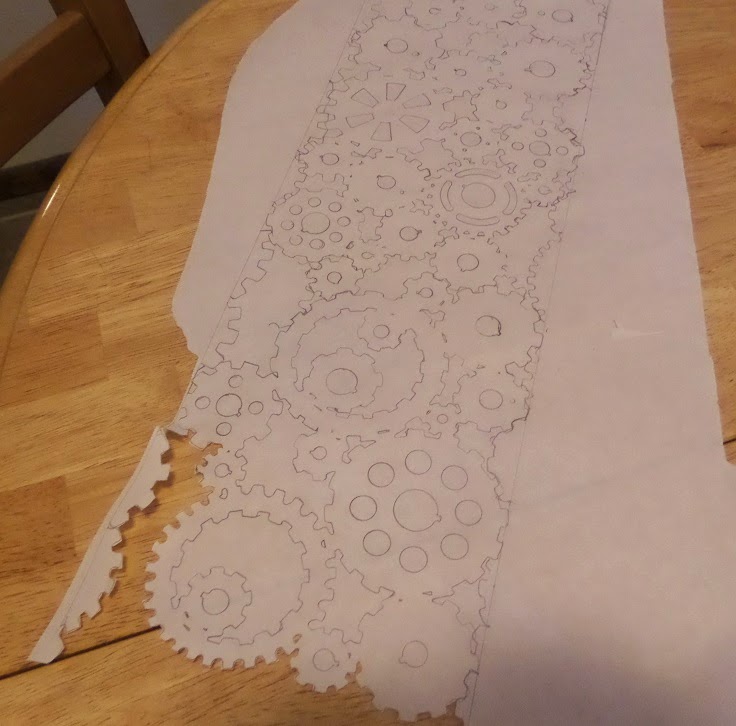
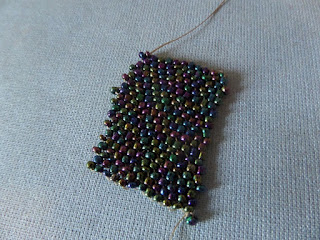
Piece in process
I alternated rows of a shiny black bead, and a variegated purple. They were more uniform, although smaller than I really wanted. The thread is a spool that I had, and it was pretty easy to use. It had been treated for beadwork although I did wax the tip to keep it from fraying.
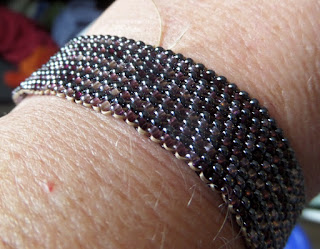
almost finished bracelet
To finish the weaving, I wove the thread between the last row and the first row, creating a slip on bracelet. Now, I need to deal with the threads. My plan is a drop of superglue or nail polish on the knots, then weaving the thread between the beads. I think I will have to use a needle to do that, and I don't think needle and thread will fit through the beads I have. Hmmm that might be one of the tips I need to look up in the book next time.

For my next project, I used bigger beads, but still ended up using thread. The wire just wouldn't weave the beads close enough together. This one was worked basically in a spiral so I ended up with a tube, although most of the rest is pretty much like the first one. I may lose this bracelet to Raine, though. She tried it on and walked away. I only got it back so I could take pictures.

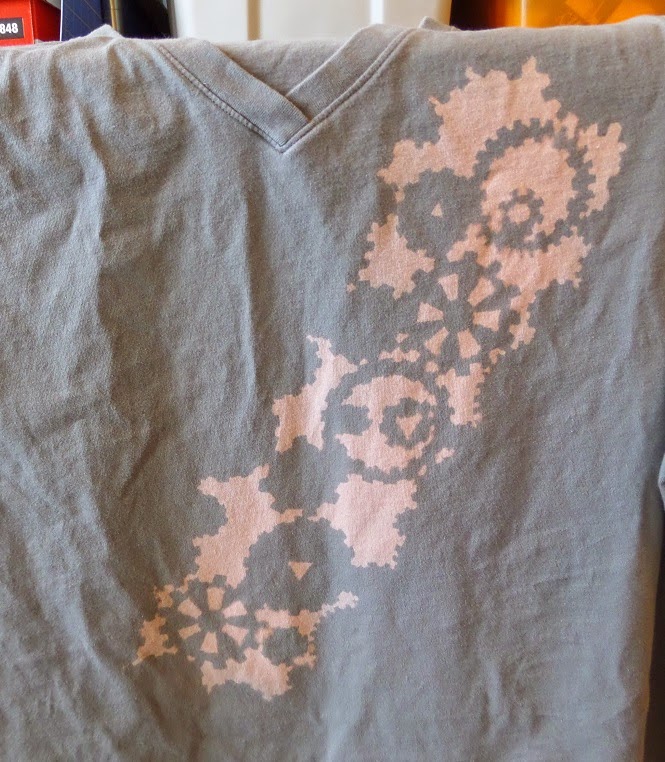
coppery tube bracelet
Two things I liked about this project. First, since the beads were bigger, it went a lot faster, and since the bigger beads have bigger holes, I could knot thread together and it would still fit through the beads. Second, since it is a tube, I could hide the thread ends in the center of the tube. I like things that are finished when they are finished.

So, beginner bead weaving... learning from a book. Not the only book I'll be looking at this summer!

Tuesday, June 16, 2015

Wait, Wait, I AM Making Stuff...

Summer should be time for those creative pursuits that I don't have time or energy for during the school year. This summer I haven't felt like I've been taking advantage of that. I almost feel like I'm procrastinating doing any projects. Time to do the dishes, the laundry, the....

When I really thought about it today, I've actually been working on a variety of projects. Just not blasting my way through them. First, while I still haven't put hair on this doll
sorry, baldy...
I have been working my way through the instruction book and making other outfits and accessories.

I checked a book out of the library on doing peyote stitch with beads. It took me several tries to get it to even look this good
not very good at all, really.
The author made a point of saying how important it was to get beads that have uniform size, and she was right, but those were a little bigger than the seed beads I'm working with now. Since the peyote stitch is kind of an alternating bead pattern, I thought that using two different colors of beads would help me not double back on my work or stuff like that. I think it did help with that, too. Here is the piece I'm working on now, that I will happy making into a bracelet.
I like the varigations on purple beads in this.
Of course I had a couple of tops in the basket, waiting to be finished, and I got one done in time to wear it during a 3 day training we went to in Ruidoso. The other is still there, patiently waiting for its turn. Soon, I say. Soon. Other clothing on the horizon as well. I want to work on some knit pieces, and the tub with khaki solid & print was calling to me pretty strongly today.

In addition, I've been working on my quilt blocks. I had made a stack of blocks to sew together, and I've been working on them. Slowly, it seems. I don't want to rearrange the pieces by accident and change the block pattern. Then it is a lot of back and forth from the sewing machine to the ironing board. I miss my sewing buddy with this project because we have partnered up on this task in the past. Roxanne is recovering from weight loss surgery, and I hope she will be up for joining me SOON!
Still loving the blue/brown combination.
At least some of these projects will get their very own posts as I finish - or at least progress - with them, and think about my process, and what I learn with each project. Not procrastinating after all.

Wednesday, June 3, 2015

Nature and Creative Process

I got to revive my camping spirit last week. My husband and I bought a small trailer, and I got to spend a week in the Gila Wilderness - or at least one of the tamer parts of it. My brother and my daughter and I were there the whole time, my husband came when his work schedule allowed, and some friends joined us as their schedule allowed as well. There was hiking, and sitting around a campsite reading and relaxing, there was rain, and good food... and some not-so-good for you food. I mean if you have a campfire, there must be marshmallows around somewhere, right?

We got to see some deer, and some hawks and bats. We heard - but never saw - some turkeys in the evenings. And there were lizards everywhere.
hanging out on a tree
The lake was at a much lower water level than I had ever seen it before, but NM has been in a drought for some years now. The dam had gotten some needed repairs, and the water looked good. The ducks were out and so were the goldfish. Yes. Goldfish. Big ones. The little fishing piers they had installed at various points around the lake were sadly resting on dry land, with no water near. There was almost a walking path to the little island (that was much bigger than usual this year). It may sound like I'm complaining, but I'm not. I am concerned about a place I hold dear childhood memories of, and I was so happy to get to go get reacquainted with it.

view of the island, the dam, and some dry bits that should be wet bits
The hikes were often a physical challenge to my old, fat self, but I was up for them. Slow, but moving! I was happy to be outdoors, and in nature, where I have always gotten creative inspiration. Colors, patterns, organic shapes. Beauty and peace, flow and resilience are all there for the finding.
sunset of course
And there should be fun!
Carl made a campfire - you know, for marshmallows
Raine tried out the hammock!

We hiked up to see the cliff dwellings
And we touched base with friends and family without the distractions of busy lives...
If that doesn't bring some happy creativity to my brain, I don't know what will.
butterfly... or moth?


Sunday, April 26, 2015

It's a Ginger

So I finished - including hair - the second crocheted doll today. No. Don't ask about the first doll's hair! Don't do it! Second doll today!
rockin a mini!

The first doll was a light tan, that I wasn't sure would be a great color for the doll's "skin," but is growing on me, actually. I used what I had in my stash at the time. I think that is appropriate when trying out a pattern. For my birthday present, Carl took me yarn shopping, and we ended up with a couple of "skin" colors, including this pale, pale pink which has turned out well, I think I even have enough in the skein for a second doll, if I want.

I had a very soft yarn for her hair so I decided to do a latch hook type of technique to attach it. I cut all the strands one length, even though I realized that would make the front strands shorter when they were pulled to the back, which I was planning to do. I didn't want to experiment with too many facets at once, however. I wanted to see how that latch hook technique would work. I thought I would have to hook some in every stitch on that doll's head, and I started at the scalp seam, worried I should have started at the center and worked my way out. Turned out much easier than I thought it might, and much less tedious than I was afraid. The first two rows I did provided a good amount of hair, so I skipped a row, and then did a row the rest of the way to the center. Since there weren't THAT many rows, and the number of stitches decreased going to the middle, it went much more quickly than the first two rows did. It needed the middle done, though, to provide fullness at the top of the head. Still it made a LOT of hair.

All. That. Hair.
I haven't trimmed it up yet. I think it needs a little, especially to even up the bottom,  but I like the "layers." I pulled the front back and tied it with a length of red yarn. I think eventually I will find a ribbon or something of the like to add in.

I just pulled the hair from the front to the back and tied it with a very small amount of the hair from the back, just to hold it in place.
Hello beautiful!
I may have to reinforce the stitching at the front of the neck as all that yarn tends to pull her head back a little. Then she's looking up a little more than I like.

I modified the pattern a little for this doll, giving her feet more than the original pattern calls for. I modified what the pattern does for shoes, and socks, and made it a little smaller so the shoes and socks would still fit as made. The toes of the socks and shoes need stuffing to keep their shape for the original doll.  I'm very happy with how the second doll's feet turned out.

both dolls' feet
Now that she's made, I'll get to work on her wardrobe. I'm seeing greens and pinks in her future!

Saturday, April 25, 2015

Ore-post post

I've been working on another crocheted doll this week.

So serious about this cuteness of this doll AND her clothes and accessories! She is a good size for kids to play with, and fairly easy to dress (some of that will depend on the clothes, of course).

I made a variation of the pattern this time, using the basic idea that the author used for the socks/shoes/boots for the doll's feet. With fewer stitches so the socks/shoes/boots will still fit, but will be "filled" better. I have so many ideas for outfits, SO MANY!!

People are asking me if I'm going to sell the dolls. It WOULD be a good excuse to make every variation I can think of... but I generally find that selling handcrafts is a frustrating and disappointing  experience for me. I am not a marketer, and I think being one - or working with one - would be helpful. I also find people kinda want the doll for the price of the yarn (if that) and if I'm selling my time, I want to get PAID for my time.

Anyway, I'll post pictures of the new doll in the next couple of days. In the mean time, here's the first doll, with her new jumper...

cutie pie, even without her hair
I think I need to make a boy one, too...

Saturday, April 4, 2015

A second chance to love it

Several years ago, I found some bright, fun fabric. It was perfect for summery kid clothes, and I cut out a shirt and a pair of shorts for either my niece or my daughter. I don't remember which, although I suspect the color palette favors my niece.

Once I got the outfit cut out, it went into my to-sew pile, as things do, and the more I looked at it, the brighter, the louder, the crazier it got. The fabric is light-weight and started to seem like it would be too light for the shorts. Needless to say, it got put the the side. And then further to the side, and then...

Well, as we got out our quilt fabrics, and I was looking for pieces to cut, I came across the fabric. Wow, that's bright, I mentioned to Roxanne, and I asked her whether she would want it in her quilt. Sure! she said. (she loves bright pinks, and I wasn't too surprised) I pulled it out, and discovered all these pieces.. right leg, left leg, collar, sleeves, shirt fronts and back. Pockets, even for shorts and shirt.

It just so happens that there is a little girl in the family, who is now about the size my niece must have been at the time, and so I looked at Roxanne, and she looked at me, and we both said, Lets sew that sucker up! Who cares if the shorts are thin and will wear out soon. They will last the summer and then that kid will grow and they wouldn't fit next year anyway. Yup!

So we sewed. I put the finishing touches on today - button holes and buttons, and this is how it looks;

cute green flower buttons
Now that it is a finished outfit, I am REALLY liking it! It's fun, and bright and summery. The shirt is sharp and the shorts look comfy. Did I mention pockets? Well, what kid doesn't love pockets?  I just wish I had her here to model it.
what's summer without shorts?
I think if it just gets to be too much bright together, she can just wear each piece separately with a solid second piece to tone it down. Cute! So glad I got a second chance to love this!


Sunday, March 29, 2015

Fascinating

A few weeks ago, just before our trip to the Steampunk convention, Wild Wild West Con, in Tucson, I started crocheting some accessories. I got the idea for them from  a post my mother-in-law called my attention to, of someone crocheting around a button and making a flower. Cute. Easy. Colorful. Then my imagination took off!

My first effort at a clockwork flower.
I had bought a tube of clock gears at the first Wild Wild West Con, knowing I could use them somehow, someway.  They are various sizes, and some are fairly small, and some have stems on one side or the other, so they can actually be kind of pokey. But I took the basic idea of crocheting around a button, and crocheted around one of the bigger gears instead. It was button sized, more or less. I used crochet cotton thread, and attached some smaller gears around the flower as well.

Well, my imagination went off!  It was pretty easy, as I had several colors of thread, and that tube of gears. But then I wanted more than just gears, so my friend Sara and I took a trip to Hobby Lobby, and I picked up some steampunkish bits and pieces, and continued crocheting.

Of course Sara got one...
By the time of the convention, I had a ziploc bag of them, and gave a few away, and wore one on my hat band. I put them on clips which seems to be handy for clipping to a pocket or hat band as well as your hair. Here are the ones I still have:

the finished and the unfinished
As you can see, I didn't just use gears for the middle of the fascinators. I found some metal buttons that seemed to work well, and even a little lock trinket. Ultimately, I liked a flower pattern with more that the five original petals, but I tried a variety of configurations. They reminded me of the snowflakes I crocheted oh-so-many-years-ago. For something quick and really pretty easy, I think they worked out well.

Are they steampunk? Well, I like them to be so my answer is yes. Not everyone may agree, and that is OK. What makes something steampunk? Well, it is Victorian (which crochet is), and whimsical, and something of a mixture of hard (like gears or skeleton keys) and soft. These were definitely fun!

Thursday, March 26, 2015

OMG So Cute Crocheted Doll!

I went into my local Jo-Ann's last weekend, and glanced briefly through their selection of crafty books. Little did I know that I would come across this:
Oh so full of cuteness and ideas... even a penguin!
I bought it.

I had a coupon to help out, but I bought it.  Then, I started searching for yarn, and hooks, and trying it out. I mean who wouldn't want one of these?
I know! Right? Want!
Hmmm, a couple of issues. The author is evidently British, and their crochet stitches are named a little differently than ours. The book does have the "translations" though, and I could handle it, but it may not be for everyone. My bigger issue is with gauge.  This author does not use any of the weights for any of her yarns, and the blends are not familiar to me either (OK, I admit it, I do most of my yarn buying at Hobby Lobby, and it is acrylic. But why would I use some fancy, expensive yarn to try out a pattern for the first time? Also, I didn't find any indication of scale in the book. How big - or small - are these dolls?  At any rate, I tried out a regular skein and a very small hook and this happened:
Turned out OK, I think. 
Then I went on to the legs and torso, and finally the arms. She went from here to there

and then finally, I got the arms added. The ruler should give you some idea of the scale.
The doll in one piece
Of course, she still needs hair. The plan is to use the same yarn that I used for her scalp. Good idea to create a hair-colored scalp. The over-all instructions (once the translation is taken into account) were easy.  It says to work in spirals, however, and when one does that, the end of the rows migrate, so that my reducing rows - worked according to the pattern - are in the middle of the chest and back instead of along the sides as I'm sure the author intended. Next time, I'll modify accordingly. I managed to make ankles, if you notice. Since there are socks, shoes and boots in the patterns, I think they will come in handy. I'm really looking forward to stitching up some clothes for this cutie, and the book has quite a few clothing and accessory patterns to try out. Did I mention the penguin? And a teddy bear...


Tuesday, March 17, 2015

More weekend creations - freezer paper bleach resist dying

For Raine's birthday, my brother Carl made some awesome shirts for her. OK, he didn't really make the shirts, he decorated them. Expressly to her taste. Awesomely. She has been watching anime series on Netflix, and Soul Eater has been one of her favorites.

What a cool Birthday present!
He used a resist dying technique with bleach, and on Saturday, he came over and we both worked on shirts.

The first step is to decide on a designe, and make a pattern on freezer paper.  Having just returned from Wild Wild West Con, I was in steampunk mode and wanted gears. Ron found a gear stencil for me to use, and my first pattern looked like this:

busy busy busy
I gave up on cutting that out pretty quickly, as you can tell. The border wasn't going to work well as I had done it, and the more I looked at it, the more I felt like the number of gears was just going to end up looking muddy. So I started again.

Once you get the design onto the butcher paper, and you have cut out the parts that you want to apply the bleach to, you iron it on to the shirt.  100% cotton works best, but Carl used a shirt that wasn't. I don't know if it was because of the fiber content or what, but it was really difficult to tell whether the color was changing when he was bleaching it, but it came out like this, so you know it worked.

thundercats are cool
When you bleach them, you use a 50-50 solution of bleach and water, and Carl had a very small spray bottle. You want to be able to control where the bleach is going You also want to cover as much of the area you don't want to bleach as possible. Oh yeah, and don't forget to put a layer of cardboard between the front and back layers of the shirt. You don't want the bleach to bleed through.

Carl did some fiddly bits on his other shirt, with Mr Mets on it. I think it came out really well!

A sports team shirt for Fridays where he works.
Check out the small lines he had to make and how neatly he did it! Not sure I have the patience or the steady hand necessary for that fine work.

Once you spray on some bleach, you blot it off with some paper towels (Doesn't hurt to wear protective gloves for the spraying process). Spray bleach and blot 3 or 4 times, as your fabric and design seem to need. Then, dunk the shirt in water, to get the bleach out. You don't really want it sitting on the shirt too long. After the sink rinse, throw them in the washer for a wash and dry.

I am happy with how my gears came out, though. My second attempt was much more managable, and the stencil was really useful for making the border once I figured out how I should do that.

can't stop my clockwork heart...
I have a feeling I'll be trying out this technique again. Soon.